Showing posts with label easy. Show all posts

Thursday, March 1, 2012

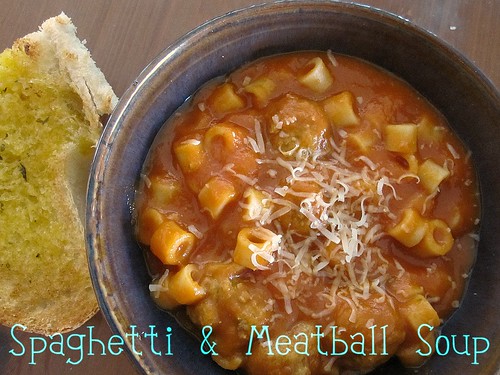
Spaghetti & Meatball Soup

*Chef's Note: The weather around these parts has gone from 70 degree days reminiscent of summer to barely over 50 degrees and overcast. In order to combat this late-winter bout of dreariness I turned to cooking soup. At this point in the season I've cooked through all my favorite recipes and was getting tired of the old standbys.  I wanted something hearty but healthy, and uncomplicated in palate. So I went back to a recipe I had marked in my America's Test Kitchen Light and Healthy 2011 cookbook. It covered all the basics and I even had 90% of the ingredients on hand. A quick trip to the store for some ground turkey and I was golden. Now, I've had some REALLY bad luck with tomato soups in the past (and the Husband is not a big tomato soup fan unless it surrounds spaghetti-o's) so I was hesitant to forge ahead and make my own tomato soup base, but I'm awfully glad I did. This came out brilliantly--creamy and rich with very little fat and all the flavors I associate with comfort food. Even the husband dubbed it "really good" and said it was reminiscent of beef-a-roni in the best way possible.  It was a one pot meal that dirtied one cutting board , one glass bowl, and one immersion blender; something this good and this tidy automatically lands itself on the rotation for as long as the weather stays chilly.*

Spaghetti and Meatball Soup

Spaghetti & Meatball Soup (a.k.a. Tomato Soup with Meatballs and Pasta)
from America's Test Kitchen Light & Healthy 2011 cookbook (with parenthetical notes by Elise)

Prep: 10 minutes
Cook: 40 minutes
Makes: 4 servings

You can use any small, bite-size pasta in this recipe: pasta alphabets are fun if you can find them. Do not use ground chicken breast here--also labeled 99% fat-free--or the meatballs will be dry and grainy. You can make your own pesto, or use your favorite store-bought variety. Serve with a light sprinkling of grated Parmesan cheese, if desired.  If you are concerned about sodium intake, substituted low-sodium diced tomatoes. 


6 ounces ground chicken (I used 93% lean ground turkey since it was on sale and I've had great success with it in the past)
3 tablespoons pesto
3 tablespoons plain bread crumbs
salt and pepper
1 onion, minced (about 1 cup)
1 carrot, peeled and chopped medium
1 small celery rib, chopped medium
1 tablespoon olive oil
3 garlic cloves, minced
2 1/2 cups low-sodium chicken broth
1 (28-ounce) can diced tomatoes
4 ounces ditalini pasta (about 3/4 cup)

1. Combine the onion, carrot, celery, oil and 1/4 teaspoon salt in a large Dutch oven (I used a 4 quart saucepan and it worked out beautifully).  Cover and cook over medium-low heat, stirring occasionally, until the vegetables are softened, 8 to 10 minutes.  Stir in the garlic and cook until fragrant, about 30 seconds. Stir in the broth and tomatoes with their juice. Bring to a simmer, reduce the heat to medium-low, cover, and cook until the carrot is softened, 15 to 20 minutes.
2. While the vegetables are simmering, mix the chicken (or turkey), pesto, bread crumbs, 1/8 teaspoon salt, and a pinch pepper together in a bowl and combine the mixture with your hands until it is uniform. Scoop heaping teaspoonfuls and gently form into 3/4-inch round meatballs--you should have about 30 meatballs.  (This is where I broke out my small oxo cookie scoop--it's 1 1/2 teaspoons, so I only filled it 2/3 of the way full. Cookie scoops are not just for cookies!) Refrigerate until ready to use.
3. Working in 2 batches, process the soup in a blender until completely smooth, 2 to 3 minutes. Return the soup to the pot and bring to a simmer. (Or if you have an immersion blender, take the pot off the stove and blend for the same time directly in the pot.)
4. Stir the meatballs and pasta into the pot and cook until the pasta is al dente and the meatballs are cooked through, 12 to 15 minutes. (This should be done gently, as we don't want the meatballs falling apart.) Season with salt and pepper to taste and serve.

Tips:
* (This one from the book) To prevent getting sprayed or burned by an exploding blender top, fill the blender jar only two-thirds full, hold the lid in place with a folded kitchen towel, and pulse rapidly a couple of times before blending continuously.
* I know blending the soup for 2-3 minutes seems long, but this step is mandatory if you want that creamy tomato soup texture we're after.
* After you add the noodles, scrape the bottom of the pot every couple of minutes since the pasta will stick somethin' fierce. Also, al dente is key here since the pasta will continue to cook even after the soup is off the heat and you don't want to end up with sogged-out pastas.
*This keeps well in the fridge and reheats nicely. I'm sure it could easily be doubled.
*To make this into a really quick weeknight meal, prepare the tomato soup base by following steps 1 and 3 and freeze that. Then when you'r ready to make the rest of your soup, defrost the base, make your meatballs and stir them and the pasta into the simmering soup and cook as directed. You could even make double the amount of soup base one night, finish half for dinner and freeze the other half.  You would be using the same amount of dishes and have twice the meals!

Monday, April 4, 2011

Quick Tip: Braised Vegetables

Much of my meals rely on a small number of techniques that I use so often I forget they are learned skills. In order to demystify cooking a little further, I'm going to walk through these skills step-by-step. Hopefully these "Quick Tips" will be beneficial and if you have any questions, feel free to ask them in the comments and I'll either answer them there or use that as the subject for another "Quick Tip."

Braised Vegetables 1

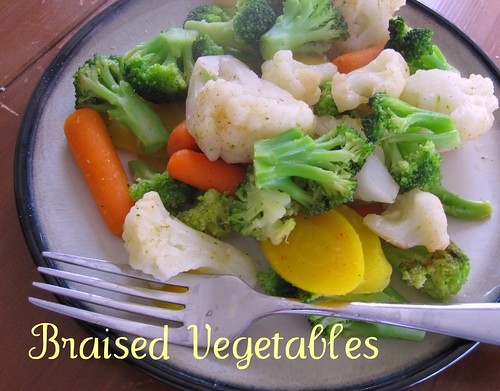
*Chef's Note: "Braising is a combination cooking method using both moist and dry heat" (thanks, Wikipedia). Thus braising vegetables combines sauteing (dry heat) while steaming the vegetables in their own juices (moist heat). This is my go-to way to prepare vegetables for dinner. In my 4 years of more serious attempts at cooking I have yet to mess it up. It works amazingly well for frozen veggies and, let's be honest, when I'm putting effort into a main dish I don't often feel like prepping and cooking raw vegetables. Regardless of the vegetable you use, these bad boys go from the freezer to the table in less than 10 minutes. And they're awfully tasty. Even Husband, who feels apathetic toward most cooked vegetables, goes back for seconds. *

Braised Vegetables
A Snozzcumber Soup Original

Prep: 2 minutes
Cook: 8-12 minutes
Makes: as much as you want to make

Ingredients

fresh or frozen vegetables
oil
salt-based seasoning

In a medium skillet, heat the oil on medium heat. The amount of oil obviously depends on how many vegetables you plan on cooking as well as the finish of your skillet; if you're working with a non-stick skillet and have 2 cups of veggies, you'll only need a quarter sized drizzle of oil, but If you're working with a stainless steel skillet, you'll need more. Also remember that frozen vegetables will shrink when cooked, especially smaller ones like corn and green beans.

Braised Vegetables 2

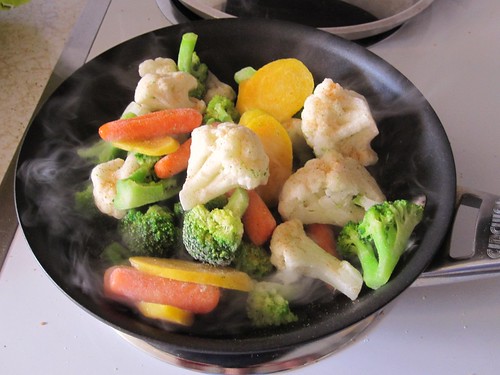
When the oil is hot enough to sizzle when a vegetable is placed in the pan, add the vegetables and sprinkle with your seasoning. I'm a big fan of Lawry's Seasoned Salt with pretty much all vegetables (you can see the paprika bits in the picture) but you can mix it up with some Cajun Seasoning, or a steak rub that has a high salt content. Or you can go the purist route and just add salt and pepper. Stir things around to get everything seasoned and cover with a lid.

Every 3 or 4 minutes give the vegetables a quick stir to keep things cooking evenly. The water in the vegetables should be enough to steam everything through, but if you cook them on too high heat you may need to add a few teaspoons of water if things look dry. Once the vegetables are as done as you'd like, pull them off the heat and serve.

There's no real "right" time when the vegetables are done--it's up to you; Husband and I like our green beans more done that other veggies so they get a few more minutes in the pan. The only way you can botch this is if you drastically over-cook or over-salt your food. And then you're only out a couple bucks worth of food, right?

This is a great way to add vegetables to a meal like meatloaf or a casserole. When that dish has 15 minutes left in the oven, go to work at the stove with your vegetables and you'll have a beautifully choreographed dinner that's done at the same time. It can also piggyback off a skillet previously used for the same meal. I got this technique from my mom who had to cook for a family of 7, so it works for single serving meals as well as hordes of hungry people.

Enjoy!

Monday, March 7, 2011

Sweet French Dressing

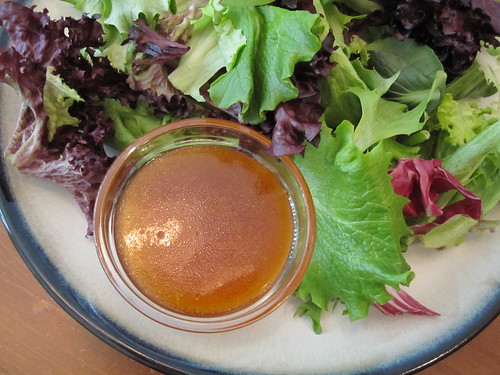
*Chef's Note: I recently jumped into the world of eating lots of fruits and vegetables (you know about that whole food pyramid thing? Genius!). One thing that smoothed my transitions from a few veggies to a lot of veggies was this dressing. I could eat a whole raw cucumber dipped in this shockingly bright orange sauce and be a happy happy girl. It's particularly tasty on slightly bitter veggies like spinach and cucumbers rather than sweeter, milder ones like carrots.*

2011-03 051 by Snozzcumber Soup


Sweet French Dressing (a.k.a. Nikki Sauce)
from my little sister's friend Nikki

3/4 C sugar
1 tsp salt
1 TBS Worcestershire Sauce
1/4 C ketchup
1/3 C apple cider vinegar
1 scant C vegetable oil (NOT Canola oil)
1 tsp grated or finely chopped onion (of if you're lazy, 1/2 tsp onion powder)

Combine ingredients in blender and blend for about 60 seconds. The dressing will be the color of a bandaid (no kidding), but as it sits it will deepen to a bright orange.

Tips:
*The oil shouldn't separate, but if it does, blend until it emulsifies.
*If you like a more acidic dressing, only add 1/2 C of sugar
*I make this in a pint sized wide-mouth Mason jar with my hand blender--it stores nicely in that same container and makes very little mess.
*This recipe halves well (especially if it's feeding two people) and keeps in the fridge for about 2 weeks.

Tuesday, March 31, 2009

Simple and Chewy Oatmeal Chocolate Chip Cookies

*Chef's Note: 9 times out of 10 I prefer cookie dough to cookies (with a few minor exceptions) and the [fully baked] cookies I like are moist and chewy. At the insistence of Husband, we made this cookie dough on Sunday night, ate some of the dough and put it away. By the next day the dough had firmed up a little bit and the oatmeal had soaked up enough of the moisture to keep the cookies from spreading when baked. This seemed to be the ideal way to handle the dough as it was pretty solid and easy to roll into balls. As it is with most cookies, the smaller these guys are, the cuter they are. And if they're small you can justify eating 15 because, really, "they're not that big" and they have oatmeal in them. So they're basically health food.*


Prep: 30 minutes
Bake: 10 minutes
Oven: 325 degrees
makes about 4 dozen big cookies or 6 dozen small cookies

1 cup butter, softened

1 cup packed light brown sugar

1/2 cup white sugar

2 eggs

2 teaspoons vanilla extract
(for cookies I always use more vanilla than it calls for)
1 3/4 cups all-purpose flour (more if you are going to bake them right away rather than chilling. It helps firm up the dough so the cookies don't spread)
1 tablespoon baking soda (sounds like a lot, but isn't)
1/2 teaspoon salt

3 cups quick-cooking oats
(we used old fashioned and they worked fine)
1 cup chopped walnuts
(any nuts work well--we used finely chopped almonds and it tasted fabulous)
1 cup semisweet chocolate chips
(butterscotch chips would be fabulous too--could do half and half)

  1. Preheat the oven to 325 degrees F (165 degrees C).The lower temperature lets the cookies bake all the way through without making them really crusty on the outside.
  2. In a large bowl, cream together the butter, brown sugar, and white sugar until smooth. Beat in eggs one at a time, then stir in vanilla. Combine the flour, baking soda, and salt; stir into the creamed mixture until just blended. Mix in the quick oats, walnuts, and chocolate chips. Drop by heaping spoonfuls onto baking sheets covered with parchment paper.
  3. Bake for 10 minutes in the preheated oven. Pull them out when the cookies look like they are just about to brown (they will look pretty blond but still cooked--shiny means they are underdone). Lift the parchment paper out of the pan so the cookies can cool on the counter. Once they have hardened up a little (about 4 or so minutes) transfer to a cooling rack.
When storing chewy cookies one way to keep them from drying out is to place a piece of bread in the container with the cookies. The bread is moist enough that it keeps them chewy, although the outside crispiness will lessen because of this. (Since no one really likes the heels of the bread around here we usually put those to good use this way.) Change the piece of bread when it gets dry and crusty if everyone hasn't eaten the cookies by then.

Wednesday, March 4, 2009

Starving-College-Student "Homemade" Salsa

*Chef's Note: These measurements are an estimate. Each batch of salsa is different for one reason or another--for instance, older onions aren't as potent but older jalapeños are probably able to burn off people's flesh--so you need to work with your ingredients to find out what jives. I suggest having a bag of chips handy to taste test your salsa during its creation.*

Prep: 20 minutes
Makes about 1 quart

2 16 oz cans diced tomatoes (drained if you want thicker salsa, but I never drain mine)
1TBS diced hot jalapeños (makes for a mediumish hot salsa for me but it burns Jenny's nose hairs. This is also a great way to use up the rest of the jalapeños from an earlier recipe.)
2 tsp chopped garlic (Jenny always wants MORE!)
1/2 of a medium onion, chopped finely
1/2 C chopped fresh cilantro
1/2 lime, squeezed (or is it squozen?)
2 tsp sugar
Salt and Pepper to taste (the tomatoes are pretty salty already, definitely add some pepper)
Any other things you feel compelled to put in there like chili powder or cumin or green onions--a lovely touch but unnecessary

Combine everything in a medium sized bowl and mix it up. If you have a blender handy and would like to make the bits a little smaller and give some body to the juice you can pulse it until you're satisfied. I wouldn't puree the whole thing--that turns everything into tomato slush. A hand blender works amazingly well because you can blend it directly in the bowl (I have pledged love to mine over and over and will probably continue to do so). Taste and add more ingredients until you are satisfied with the outcome.

Serve with your mom and tortilla chips, or in anything that requires salsa.