Thursday, November 17, 2011

No Sugar Oat Drops

*Chef's Note: I have tried to find a recipe for some sort of homemade granola bar for years now without much success.  I finally found this recipe (thanks to Pinterest) and scoffed at it initially; how could it even taste good? It's like a cookie but without sugar and HOW CAN YOU LIKE A COOKIE WITHOUT SUGAR?!? But then the more I thought about it, the more I realized I needed to give it a try. And boy howdy did it turn out well!  This particular snack is full of all sorts of protein thanks to the nuts, terribly high in fiber (from the oats, dried fruit, and nuts), high in those "healthy fats" they keep talking about, and just a little bit sweet because of the bananas and the fruit.  These are really filling for how small they are and freeze well; this makes them perfect for taking in lunches and grabbing when you're headed out the door and are trying to stave off that dreaded blood-sugar plummet I've come to know so well.  These also happen to be vegan and gluten free. And they make your house smell amazing when they bake. And they take just as long to make as a batch of cookies. Are you sold yet?*


2011-11 067

No Sugar Oat Drops
adapted from Blueberry Girl


Prep: 20 minutes
Cook: 20minutes
Makes: 18 cookies


1 1/2 cups old fashioned rolled oats
1 cup coconut flakes (I used the kind you can find in the baking aisle but if you really wanted to go super healthy you could get unsweetened flakes at a whole foods store)
1/2 teaspoon salt 
1 teaspoon cinnamon
1/2 teaspoon allspice (I didn't have any, so I used 1/8 tsp cardamom and 1/4 tsp nutmeg)
1/4 cup of almond meal or flax meal*
1/2 cup mixed nuts, finely chopped (I used almonds and walnuts)
1 cup dried fruit (I used 1/2 dried cranberries, and 1/2 raisins)


3 ripe bananas, mashed (the browner the banana, the sweeter it becomes)
1/4 cup canola oil
1 teaspoon vanilla extract


Preheat oven to 350 F. Line baking sheet with parchment paper. 
In a large bowl, combine oats, almond/flax meal, mixed nuts and coconut . Stir in spices and salt. Add dried fruit and mix well, making sure the fruit doesn't clump.


In a smaller bowl (or a blender, if you're like me and cannot stand chunks of banana) combine canola oil, mashed banana and vanilla extract. Pour wet ingredients over dry ingredients and stir until well combined. 


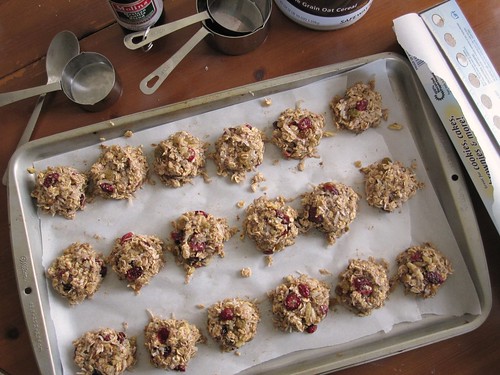
Using measuring cup, scoop up a scant 1/4 cup of dough and drop it on the cookie sheet. Press the dough together with your hands into a flat-ish cylinder, or pack the dough into a round cookie cutter to form. Because these cookies don't spread when baking they only need to be an inch or so apart. 


Bake for 20 minutes until edges are golden brown, rotating the pan halfway through baking.


oat drops


Tips:
*If you don't want to buy almond meal or flax meal, blend 1/4 cup of almonds or flax seeds with 1 teaspoon of flour or cornstarch until the mixture looks like cornmeal (the flour or cornstarch will absorb the oil that comes from the ground up almonds or flax). If it starts clumping, stop processing otherwise you'll end up with almond butter or whatever flax seeds turn into when it's pureed. You'll want to use cornstarch to keep this gluten-free. 
*This recipe is not hard and fast--explore using different nuts or fruits or less fruit or maybe add a bit of molasses to the banana mixture. Just remember to keep the proportions the same, so if you take away the  nuts entirely, add that much more rolled oats to keep things in balance. Likewise, if you're short a banana but you have applesauce, try the substitution. 

Friday, November 4, 2011

Cornmeal Biscuits

Hi again. I know it's been a while.  Can I blame my lack of posting on my slow-as-cold-tar computer?  Hopefully sometime I'll get a new one and therefore be more willing to upload and edit pictures so I can keep sharing awesome recipes. I made this one yesterday and felt compelled to share.  


*Chef's Note: I have a great love for all things America's Test Kitchen because of their awesome recipes backed by science.  This makes me happy on so many levels: my foodie, my science geek, and my perfectionist--this food comes out good every single time. This recipe comes from Cook's Country, a cooking show made and hosted by the ATK people but has a more home-style feel to the food they create. This was my first foray into making biscuits at home and I feel like it went well, but I know I can get better results with more practice. These biscuits are hearty enough to be dunked in soups (they are seriously awesome in chicken broth-based soups) and rather exquisite when slathered with honey butter.*


Cornmeal Biscuits

Cornmeal Biscuits 
from Cook's Country

Prep: 20 minutes
Cook: 15 minutes
Makes: 12 2 1/2" round biscuits or 16 2x2 1/2" square biscuits

Ingredients

1 C cornmeal (the finely ground stuff, not the larger-grained stuff you use to make polenta)
1 1/4 C buttermilk
1 tsp honey

2 C all purpose flour
1 tablespoon baking powder (yes, that seems kind of high, but trust me here)
1/2 teaspoon baking soda
1 teaspoon salt
1 1/2 sticks (3/4 C) cold unsalted butter cut into 1/2 inch cubes

Directions

Preheat oven to 450 degrees.

In a medium bowl, whisk together the cornmeal, buttermilk, and honey and let it sit for 10 minutes.

In a large bowl or the bowl of a food processor, blend together the flour, baking powder, baking soda, and salt.  Cut in the butter cubes until the mixture resembles course meal.

Combine the buttermilk mixture and the flour mixture and fold together until just combined and there's no remaining flour. Do not overwork the dough--it will be quite shaggy and not hold together very well.

Lightly flour your board and knead the dough a few times.  Pat it into a 9" circle that measures about 3/4" thick.  Using a 2 1/2" biscuit cutter, cut out biscuits, flouring your cutter between each cut. Pat out your dough scraps and cut out remaining biscuits. (If you have no biscuit cutter like me, pat your dough into an 8"x10" square and mark it into 16 squares.  Use a bench scraper or a knife to cut out the biscuits.)

Place the biscuits on a parchment paper-lined tray.  Bake at 450 for 5 minutes until the biscuits start to rise, then turn the oven temperature down to 400 and bake for 8-12 minutes until golden brown and risen.  (If your oven is obtuse like mine, you may need to rotate your pan halfway through the baking process to ensure even browning.)

Tips
*If you don't have a food processor or a pastry blender, you can still achieve excellence in butter cutting.  Just freeze your butter and then grate it with the large holes in a box grater.  After mixing in your butter, cut through the flour mixture with two knives until it looks like course meal.
*Really, don't over-work the dough.  The biscuits cut from the middle of the rolled out dough took less of a beating and they rose beautifully, while my outside biscuits suffered more pummeling and didn't rise much.  They still taste great though.
*I freehand my honey butter and this time I went with about 1/2 a stick of butter, 3 tablespoons powdered sugar, and a tablespoon and a half of honey.  Make sure you sample it to make sure it tastes right (such hardship!) and add whatever you deem necessary (cinnamon? vanilla extract? orange zest?).

Monday, April 4, 2011

Quick Tip: Braised Vegetables

Much of my meals rely on a small number of techniques that I use so often I forget they are learned skills. In order to demystify cooking a little further, I'm going to walk through these skills step-by-step. Hopefully these "Quick Tips" will be beneficial and if you have any questions, feel free to ask them in the comments and I'll either answer them there or use that as the subject for another "Quick Tip."

Braised Vegetables 1

*Chef's Note: "Braising is a combination cooking method using both moist and dry heat" (thanks, Wikipedia). Thus braising vegetables combines sauteing (dry heat) while steaming the vegetables in their own juices (moist heat). This is my go-to way to prepare vegetables for dinner. In my 4 years of more serious attempts at cooking I have yet to mess it up. It works amazingly well for frozen veggies and, let's be honest, when I'm putting effort into a main dish I don't often feel like prepping and cooking raw vegetables. Regardless of the vegetable you use, these bad boys go from the freezer to the table in less than 10 minutes. And they're awfully tasty. Even Husband, who feels apathetic toward most cooked vegetables, goes back for seconds. *

Braised Vegetables
A Snozzcumber Soup Original

Prep: 2 minutes
Cook: 8-12 minutes
Makes: as much as you want to make

Ingredients

fresh or frozen vegetables
oil
salt-based seasoning

In a medium skillet, heat the oil on medium heat. The amount of oil obviously depends on how many vegetables you plan on cooking as well as the finish of your skillet; if you're working with a non-stick skillet and have 2 cups of veggies, you'll only need a quarter sized drizzle of oil, but If you're working with a stainless steel skillet, you'll need more. Also remember that frozen vegetables will shrink when cooked, especially smaller ones like corn and green beans.

Braised Vegetables 2

When the oil is hot enough to sizzle when a vegetable is placed in the pan, add the vegetables and sprinkle with your seasoning. I'm a big fan of Lawry's Seasoned Salt with pretty much all vegetables (you can see the paprika bits in the picture) but you can mix it up with some Cajun Seasoning, or a steak rub that has a high salt content. Or you can go the purist route and just add salt and pepper. Stir things around to get everything seasoned and cover with a lid.

Every 3 or 4 minutes give the vegetables a quick stir to keep things cooking evenly. The water in the vegetables should be enough to steam everything through, but if you cook them on too high heat you may need to add a few teaspoons of water if things look dry. Once the vegetables are as done as you'd like, pull them off the heat and serve.

There's no real "right" time when the vegetables are done--it's up to you; Husband and I like our green beans more done that other veggies so they get a few more minutes in the pan. The only way you can botch this is if you drastically over-cook or over-salt your food. And then you're only out a couple bucks worth of food, right?

This is a great way to add vegetables to a meal like meatloaf or a casserole. When that dish has 15 minutes left in the oven, go to work at the stove with your vegetables and you'll have a beautifully choreographed dinner that's done at the same time. It can also piggyback off a skillet previously used for the same meal. I got this technique from my mom who had to cook for a family of 7, so it works for single serving meals as well as hordes of hungry people.

Enjoy!

Friday, March 18, 2011

Tortellini and Roasted Red Pepper Soup

 by Snozzcumber Soup

*Chef's Note: This recipe was sent to me by a long-time friend and blog reader, Mitchell. I know his dad is a foodie and must have passed that love of food onto Mitchell, because this soup was great. It's simple, albeit a little expensive, and would be perfect for a night of entertaining where you want something fancy but no-fuss; it goes beyond regular noodles-and-tomato-sauce without being too weird for the less adventurous eater.*

Tortellini and Roasted Red Pepper Soup
[slightly] Adapted from Mitchell's recipe

Prep: 10 minutes
Cook: 15 minutes
Makes: 6 main dish servings

Ingredients

8 oz white mushrooms
2 cloves garlic, diced
1 TBS olive oil (or butter)
2 (16 oz) jars roasted red peppers (found in the salad dressing aisle)
2 (14.5 oz) cans chicken broth
1 tsp dried basil
1 tsp dried oregano
1/2 tsp salt
1/2 tsp ground black pepper
2 (9 oz) packages fresh cheese tortellini, uncooked

Directions

Place the roasted red peppers and liquid in a blender or food processor, and blend until smooth.

Heat olive oil in large saucepan. Chop mushrooms and, once the oil is hot, add mushrooms to the pan and cook for 5 minutes or until the mushrooms begin to brown. Add the garlic and cook one minute.

Stir in the pureed red peppers, chicken broth, and seasonings. (It will look really runny but it will thicken substantially as it cooks.) Bring the mixture to a boil. Add the tortellini and continue cooking, uncovered, on medium high-heat for 8-10 minutes, or until pasta is al dente.

Tips
*This can easily be made into a sauce instead of a soup by using less of the chicken broth (half? maybe more?) and cooking the pasta in a separate pot of water. You would still need to cook the sauce for 8-10 minutes to allow it to thicken.
*To cut down on costs, this could be made with canned roasted tomatoes--the roasting would give it more depth than a regular tomato soup.
*Try browning some diced onions and adding a TBS or so of white cooking wine before cooking the mushrooms--this would give the dish a hint of sweetness and balance the boldness of the red peppers.
*Stick with the cheese tortellini. The soup doesn't leave you a lot of room to taste a more complex flavored pasta.

Monday, March 7, 2011

Sweet French Dressing

*Chef's Note: I recently jumped into the world of eating lots of fruits and vegetables (you know about that whole food pyramid thing? Genius!). One thing that smoothed my transitions from a few veggies to a lot of veggies was this dressing. I could eat a whole raw cucumber dipped in this shockingly bright orange sauce and be a happy happy girl. It's particularly tasty on slightly bitter veggies like spinach and cucumbers rather than sweeter, milder ones like carrots.*

2011-03 051 by Snozzcumber Soup


Sweet French Dressing (a.k.a. Nikki Sauce)
from my little sister's friend Nikki

3/4 C sugar
1 tsp salt
1 TBS Worcestershire Sauce
1/4 C ketchup
1/3 C apple cider vinegar
1 scant C vegetable oil (NOT Canola oil)
1 tsp grated or finely chopped onion (of if you're lazy, 1/2 tsp onion powder)

Combine ingredients in blender and blend for about 60 seconds. The dressing will be the color of a bandaid (no kidding), but as it sits it will deepen to a bright orange.

Tips:
*The oil shouldn't separate, but if it does, blend until it emulsifies.
*If you like a more acidic dressing, only add 1/2 C of sugar
*I make this in a pint sized wide-mouth Mason jar with my hand blender--it stores nicely in that same container and makes very little mess.
*This recipe halves well (especially if it's feeding two people) and keeps in the fridge for about 2 weeks.

Friday, March 4, 2011

And so the blog grinds back to life...

After almost exactly two years of being derelict, I'm attempting to get things back up and running. Husband has a new job (we're no longer college students!! We can buy expensive produce and not feel guilty!!!) and I have more time to myself than I probably should, so I'm going to do my best to document the good meals that come out of my kitchen (because we all know how badly dinner can flop--I'm looking at you, Velveeta cheese!).

I've had a talk with myself and decided to not aim obscenely high regarding my goals of this little blog, and I think I can speak for Jenny too: we want to create a forum to share relatively easy, healthy meals for busy people and some helpful skills we've picked up from our years in the kitchen.

I'm trying to keep my ego in check and not anticipate a huge following; mainly I want to reach my friends who have asked for recipes in the past. And let's be honest here--my photography skillz are lacking and there are much prettier blogs out there to read. A lot of my recipes will come off other blogs, but again, I'm after sharing the good stuff I find (and giving proper credit).

So now that we've had that lovely DTR, let's try this blogging thing again, shall we?