
from America's Test Kitchen (with parenthetical notes by Elise)
Prep: 25 minutes
Cook: 12-14 minutes
Makes: 2 dozen cookies
The most efficient way to bake these cookies is to portion and bake half of the dough. While the first batch is in the oven, the remaining dough can be prepared for baking. Avoid using a nonstick skillet to brown the butter. The dark color of the nonstick coating makes it difficult to gauge when the butter is sufficiently browned. (Or be like me and use your non-stick skillet because you don't have anyting else but check the color compulsively against your white spatula you use to stir.) Use fresh brown sugar, as older (read: harder and drier) brown sugar will make the cookies too dry.
14 tablespoons unsalted butter (1 3/4 sticks)
1/4 cup granulated sugar (about 1 3/4 ounces)
2cups packed dark brown sugar (14 ounces)
2 cups unbleached all-purpose flour plus 2 tablespoons (about 10 1/2 ounces)
1/2 teaspoon baking soda
1/4 teaspoon baking powder
1/2 teaspoon table salt
1 large egg
1 large egg yolk
1 tablespoon vanilla extract (seriously, a tablespoon--and the better quality your vanilla, the better the cookies will taste)
1. Heat 10 tablespoons butter in 10-inch skillet over medium-high heat until melted, about 2 minutes. Continue to cook, swirling pan constantly until butter is dark golden brown and has nutty aroma, 1 to 3 minutes. Remove skillet from heat and transfer browned butter to large heatproof bowl. Stir remaining 4 tablespoons butter into hot butter to melt; set aside for 15 minutes.
2. Meanwhile, adjust oven rack to middle position and heat oven to 350 degrees. Line 2 large (18 by 12-inch) baking sheets with parchment paper. In shallow baking dish or pie plate, mix granulated sugar and 1/4 cup packed brown sugar, rubbing between fingers, until well combined; set aside. Whisk flour, baking soda, and baking powder together in medium bowl; set aside.
3. Add remaining 1 3/4 cups brown sugar and salt to bowl with cooled butter; mix until no sugar lumps remain, about 30 seconds. Scrape down sides of bowl with rubber spatula; add egg, yolk, and vanilla and mix until fully incorporated, about 30 seconds. Scrape down bowl. Add flour mixture and mix until just combined, about 1 minute. Give dough final stir with rubber spatula to ensure that no flour pockets remain and ingredients are evenly distributed.
4. Divide dough into 24 portions, each about 2 tablespoons, rolling between hands into balls about 1 1/2 inches in diameter. Working in batches, toss balls in reserved sugar mixture to coat and set on prepared baking sheet, spacing them about 2 inches apart, 12 dough balls per sheet. (Smaller baking sheets can be used, but it will take 3 batches.)
5. Bake one sheet at a time until cookies are browned and still puffy and edges have begun to set but centers are still soft (cookies will look raw between cracks and seem underdone, 12 to 14 minutes, rotating baking sheet halfway through baking. Do not overbake.
6. Cool cookies on baking sheet 5 minutes; using wide metal spatula, transfer cookies to wire rack and cool to room temperature.
Tips:
*When browning your butter, feel free to take your time and keep the heat lower if you're afraid of burning it. You will know you've arrived when it starts to smell like toffee (you'll know when this is--it's rich and amazing and you'll just want to stand there and inhale and inhale and inhale) and the milk solids are brown. Err on the side of under browning if you're anxious about charring your butter like I am. Also, once it's a deep golden brown, get it out of the skillet and into your bowl so it stops cooking.
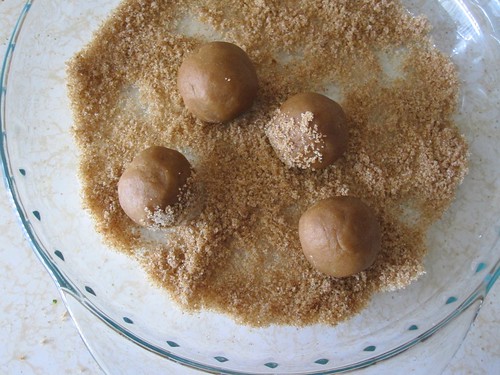 *As much as I love daintily sized cookies, these need to be large to keep the outsides crisp and the insides chewy, so don't go any smaller with your dough balls than 1 1/2 tablespoons (the size of a medium Oxo cookie scoop--the ones in the picture are a heaping medium cookie scoop). If you don't have a cookie scoop, I would recommend using a tablespoon measure to scoop out the dough to keep the cookies the same size, since size is key to making evenly cooked cookies.
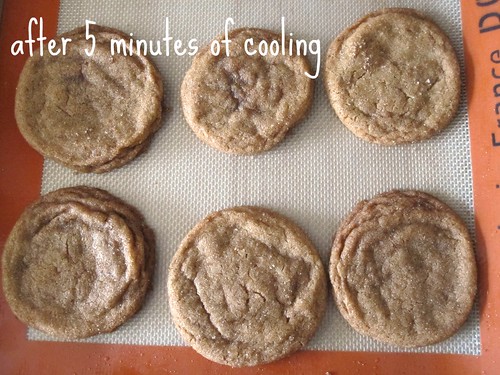
*When judging doneness, poke the very outside edge of the cookie and if it feels slightly crispy while the middle feels very soft, you're good. My oven bakes oddly and so my cookies didn't get any cracks in them. This phenomenon happens pretty consistently and, although my cookies look like wrinkly bulldog puppies, they sure taste good.
*Because these cookies are so dark to begin with, it's hard to gauge doneness by color. Unfortunately you just have to learn what works for your oven by trial and error. I found my cookies cooked much more evenly when I rotated my baking sheet half way through.
No comments:
Post a Comment